www.thisoldhouse.com made this specific write-up available and it is loaded with interesting specifics and fascinating suggestions for window replacements.
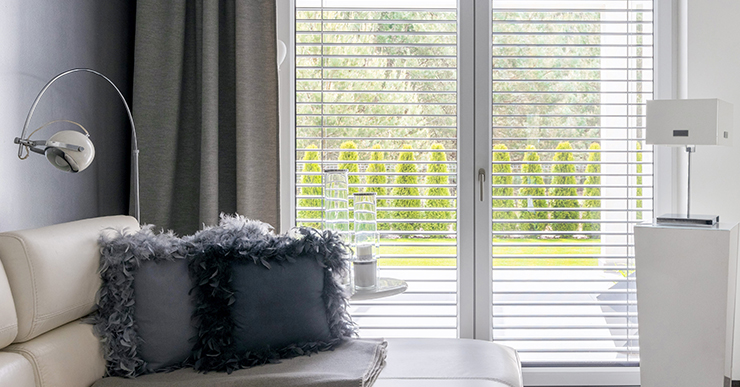
On the homeowners’ list of musts: keeping the original wood casement windows above the sink and adding a lighter look overall. Painting the windows white to match the cabinets, running the marble counters onto the backsplash and up to the ceiling, and swapping a soffit for a trio of black library-style sconces accomplished both goals.
Nathan Kirkman
BEFORE: Relics from the 1960s, slab-front maple cabinets stained a dark, orangey-brown closed in the small space. White laminate counters and basic ceramic tiles were equally dated.
Courtesy Rachel and Chad Alcorn
This story originally appeared in the Winter 2021 Issue of This Old House Magazine. Click here to learn how to subscribe.
Bumping out, adding on—big changes like these can really blow a budget. So it was a given when Rachel and Chad Alcorn renovated the kitchen in their 1928 Tudor-style home in Glen Ellyn, IL, that they would not be adding square footage or moving walls.
“We wanted to add storage, prep surfaces, light, and a more open feel, but we didn’t have unlimited funds,” says Rachel. Also key: retaining treasured original details, including a trio of casement-style sink windows and a dining nook with an arched opening.
Luckily, as an interior designer, Rachel knew just how to maximize the existing 200 square feet, trading dated finishes for a character-rich look that includes a pine-paneled ceiling, blue base cabinets, and counters made of pale marble that continues up the walls.
Chad and Rachel Alcorn, and their children, (from left) Charlotte, Soren, and Mira, lived with the existing kitchen for six years before tackling the renovation.
Nathan Kirkman
First, to brighten the space and add an airier feel, Rachel removed the upper portion of the range wall that’s shared with the dining room, where light streams in from a bank of tall windows.
Left: “A backsplash can look too busy in a small kitchen, so we carried the marble from the counters up to the ceiling for simplicity and to create a cohesive look,” says Rachel. Right: Removing much of the wall between the kitchen and dining room opened up a sight line from the range wall through tall dining room windows. A rich blue paint on the base cabinets “adds color without overwhelming,” says Rachel.
Nathan Kirkman
On the dining room side, a raised walnut breakfast bar adds more casual seating. Just inside the entry to the room, right off the foyer, she built in an antique pine cabinet to serve as a pantry, another warm wood accent that makes the new kitchen feel as though it was added onto over time.
Now the space seems larger and functions better, yet still feels cozy. “We love that the kitchen is eclectic and warm, with improved flow, way more counter space, and updates that are in character with our home’s architecture,” Rachel says. A perfect fit all around.
Left: After removing the old maple cabinets, Rachel brought back the warmth and charm of wood with a tongue-and-groove pine ceiling and a large 19thcentury cupboard. Base and crown were added to build in the 8-foot tall cabinet, which, at 3 feet wide and 2 feet deep, serves quite well as pantry and microwave storage. Right: The arch-top alcove is a favorite homework station for the Alcorns’ three kids. New built-in benches topped with easy-clean cushions add hidden storage on either side of the new walnut trestle table.
Nathan Kirkman
On the homeowners’ list of musts: keeping the original wood casement windows above the sink and adding a lighter look overall. Painting the windows white to match the cabinets, running the marble counters onto the backsplash and up to the ceiling, and swapping a soffit for a trio of black library-style sconces accomplished both goals.
Left: The doors on the uppermost cabinets to the left of the sink are inset with antiqued mirrors to help bounce light around the room. The glossy clear coat on the ceiling adds another reflective surface. Right: Newly refurbished, the kitchen’s original exhaust fan turns on automatically when the door is opened with an oak-handled iron hook. “It has a pretty strong draw so it can clear out cooking fumes,” says Rachel. “It works great!” The narrow cabinet below it, also original, holds shelves for spices.
Nathan Kirkman
Get This Look
Period-style pieces from different eras mix with timeless finishes for an easygoing, eclectic look.
1. Space-age lighting
Courtesy Arhaus
“A sixties-style chandelier can be a star in the kitchen where other lighting is simple,” says Rachel. Sputnik Chandelier, $599; arhaus.com
2. Iron-look pulls
Courtesy Signature Hardware
Matte black hardware offers a handsome counterpoint to glowing brass accents. Hadey Iron Cabinet Pull, $14, and Cast Iron Round Knob, $10; signaturehardware.com
Courtesy Kingston Brass
3. Blue cabinet paint
“Deep blue is a good choice for base cabinets—it’s grounding, yet adds personality,” Rachel says. Try Duration Home Interior Acrylic Latex in Loyal Blue, from $73 per gallon; sherwin-williams.com
4. High-shine faucet
A gooseneck spout with lever handles and a side spray in a glossy brass finish has a traditional look that suits many vintage homes. Widespread Kitchen Faucet in Polished Brass, $370; kingstonbrass.com
Floor Plans
Ian Worpole
Not altering the existing footprint preserved the scale of the 1928 house. Maximizing every inch added storage and prep space; removing a wall added light and air.
The above article was provided on this site.
Hope you valued the content that they provided. Leave me your views just below, write a quick comment and let me know what things you want us to cover in future articles.
Similar content can be found on our blog here: www.surewindows.com